 Save to Pinterest
 There's something about the smell of hot oil and vanilla that takes me straight back to a rainy Paris afternoon, watching a pastry chef at a corner café pipe delicate dough into perfect twisted rings. I didn't understand the magic then—how something so simple could puff up into clouds of crispy, eggy sweetness. Years later, standing in my own kitchen with a piping bag and nervous energy, I finally got it: choux pastry is pure kitchen theater, and crullers are the starring role.
I made these for my sister's book club once, and the moment people bit into them, the room went quiet in that specific way that means food just won someone over completely. Someone asked if I'd bought them from a bakery, and I won't lie—that felt pretty good. That's when I realized crullers aren't just dessert; they're a small, edible way to say you cared enough to try something a little bit special.
Ingredients
- Water and butter: These create the foundation of choux pastry—the butter adds richness while water helps everything steam and puff up during cooking.
- Granulated sugar and salt: A small amount of each balances the dough and prevents it from tasting flat or one-dimensional.
- All-purpose flour: This is the structure; don't sift it unless your flour is really compacted, and add it all at once for the best texture.
- Eggs at room temperature: Cold eggs won't incorporate smoothly, so pull them out of the fridge beforehand—this genuinely matters.
- Vanilla extract: A teaspoon gives you that whisper of warmth that makes people wonder what the secret is.
- Powdered sugar and milk for glaze: The milk adjusts the consistency; start with less and add more if you want it thinner, since it's easier to thin than thicken.
- Neutral oil: Canola, sunflower, or vegetable oil all work beautifully; avoid olive oil since its flavor doesn't belong here.
Tired of Takeout? 🥡
Get 10 meals you can make faster than delivery arrives. Seriously.
One email. No spam. Unsubscribe anytime.
Instructions
- Heat and melt the base:
- Combine water, butter, sugar, and salt in a saucepan and bring everything to a rolling boil. You'll see the butter melt completely and notice the mixture starting to steam—this is exactly right. Watch it carefully so it doesn't boil over, which I learned the hard way once.
- Introduce the flour:
- Add flour all at once and stir vigorously with a wooden spoon for about two minutes until the mixture forms a cohesive ball that pulls away from the pan's sides. You'll feel the resistance build as you stir; this is the dough coming together and it's satisfying to watch.
- Cool briefly and add eggs:
- Let the dough sit for a few minutes so it cools enough to handle without cooking the eggs when you add them. This pause also helps the dough relax and become more pipeable.
- Incorporate eggs one by one:
- Add each egg individually and beat thoroughly before adding the next, so they emulsify smoothly into the dough. You'll notice the mixture become glossy and smooth rather than lumpy—that's the sign you're on track. Finish with vanilla extract.
- Pipe onto parchment squares:
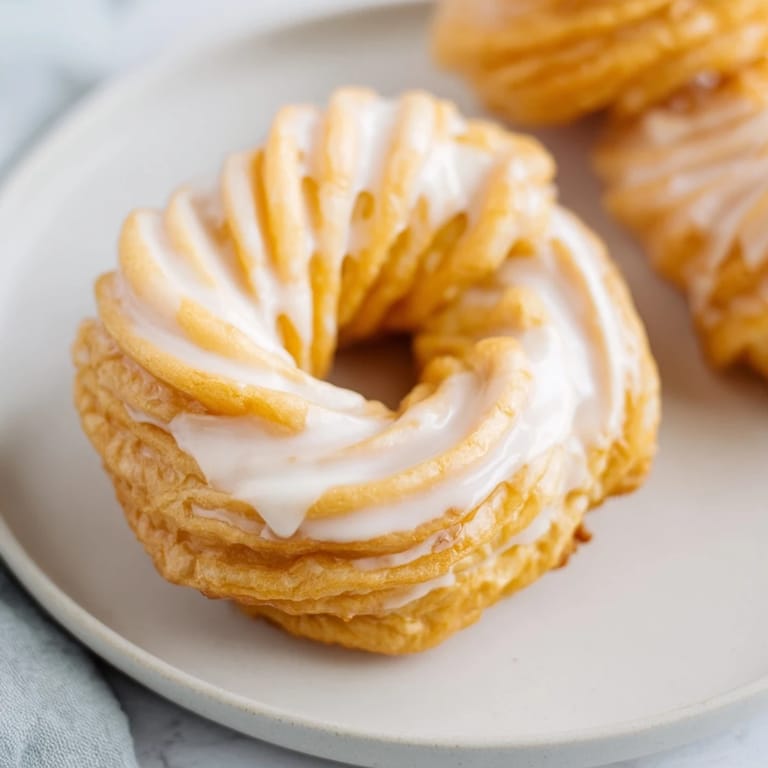
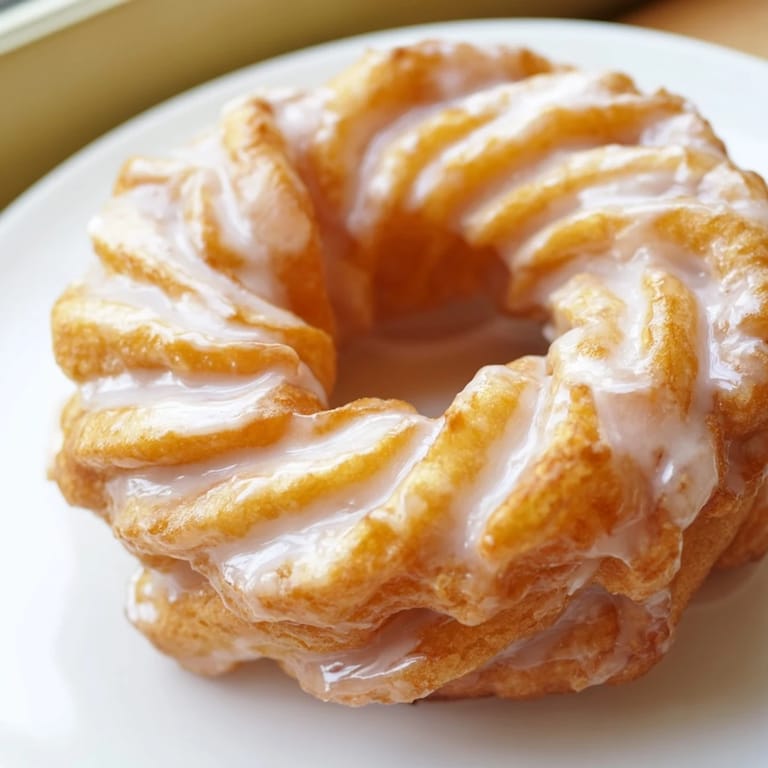
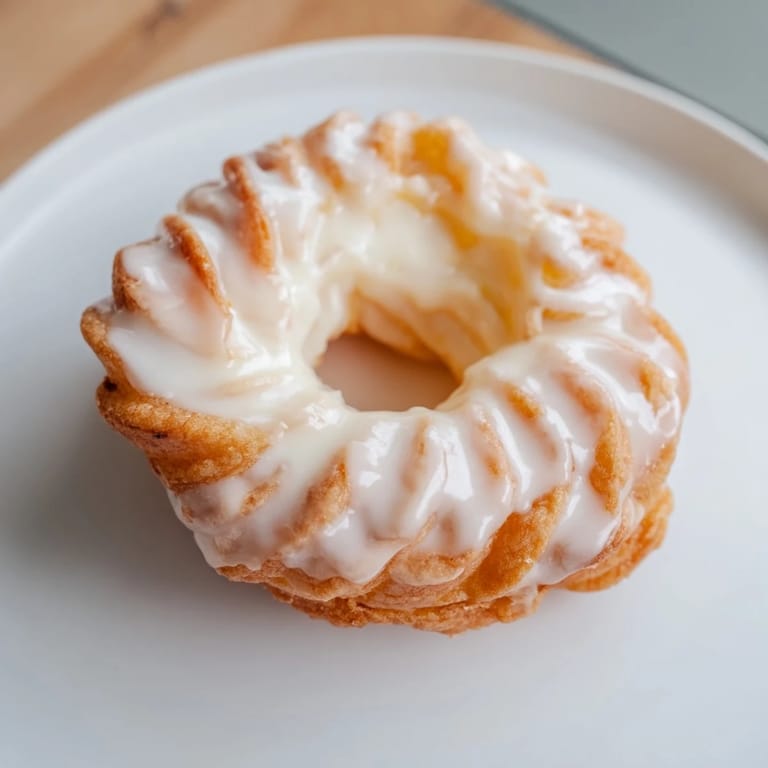
- Transfer the dough to a piping bag fitted with a large star tip and pipe 3-inch rings onto small parchment squares. The ridges from the star tip aren't just pretty; they help create those delicate crispy layers you want.
- Heat oil to the right temperature:
- Bring oil to 350°F in a heavy pot or deep fryer. Use a thermometer here because guessing usually means either burnt exteriors or undercooked interiors.
- Fry with parchment first:
- Carefully place the parchment-backed crullers into hot oil, parchment side down. After one to two minutes, use tongs to gently peel away the parchment, then continue frying for another two to three minutes per side until they're a deep golden brown and puffed up like little pillows.
- Drain and cool before glazing:
- Remove crullers with a slotted spoon and let them drain on a cooling rack or paper towels. A cooling rack is better if you have one because it lets air circulate underneath and keeps them from getting soggy.
- Make and apply the glaze:
- Whisk powdered sugar, milk, and vanilla together until you reach a smooth, dippable consistency. Dip each warm cruller into the glaze, let excess drip off, and set on a rack to set.
 Save to Pinterest
 I still remember my mom's face when I made these for her birthday breakfast—not fancy, just warm crullers on a plate with coffee. She looked at them like they were edible proof that I'd learned something real, and maybe I had. It's funny how a pastry can carry so much weight, but these ones do.
The Art of the Choux Pastry Dough
Choux pastry is one of those foundations in French cooking that seems mysterious until you realize it's just butter, water, flour, and eggs working together in the right way. The magic happens when you add the flour all at once to hot butter and water—the starches gelatinize and create a dough that's sturdy enough to pipe but will puff up dramatically when hit with hot oil. The eggs are what give it that incredible airy crumb and eggy richness; they emulsify into the dough and create steam pockets as they cook. Once you understand what's happening at each step, you realize there's nothing intimidating about it at all.
Frying Versus Baking: A Choice That Matters
You can bake these crullers instead of frying if you prefer—bake them at 400°F for 20 to 25 minutes until they're golden and puffed. They'll be lighter and less greasy, which is genuinely lovely if that's what you want. But I'm honest: the fried version has a crispy shell that shatters slightly when you bite into it, then gives way to that custardy interior, and the baked version doesn't quite achieve that same texture magic. There's a reason French pastry chefs historically fried their choux, and it's worth experiencing at least once. That said, if frying feels too daunting or you want a lighter option, baked crullers are still absolutely delicious and worth making.
Flavor Variations and Personal Touches
The basic cruller is already perfect, but I love playing with the glaze once I get comfortable with the technique. A little citrus zest—lemon or orange—adds brightness and prevents the glaze from feeling one-note sweet. You can also add a pinch of ground cardamom or cinnamon to the dough itself for something warm and slightly unexpected. Some people dust them with cinnamon sugar instead of glazing, and that's equally valid. The fun of mastering one recipe is getting to know it well enough to make small changes that feel intentional rather than random.
- Try adding one teaspoon of finely grated lemon or orange zest to the glaze for a citrus twist.
- A pinch of cardamom or cinnamon in the choux dough gives it a subtle spiced warmth.
- If you prefer texture over glaze, dust warm crullers with cinnamon sugar while they're still warm and the oil makes it stick.
 Save to Pinterest
 Making crullers changed something small in how I think about cooking—that moment when you understand why a technique exists, and you trust it instead of second-guessing it. That's when baking stops feeling like following orders and starts feeling like conversation.
Recipe FAQs
- → What dough is used for these crullers?
They are made from choux pastry, which creates a light, airy, and tender texture inside while keeping a crisp exterior.
- → How do I achieve the twisted shape?
The dough is piped into 3-inch rings on parchment paper using a large star tip and then twisted before frying.
- → Can these crullers be baked instead of fried?
Yes, baking at 400°F (200°C) for 20–25 minutes yields a less crisp but still delicious alternative.
- → What glaze is used for finishing?
A simple vanilla glaze made from sifted powdered sugar, milk or water, and vanilla extract is used for a sweet finish.
- → Are there any allergen considerations?
These crullers contain eggs, milk (from butter and glaze), and wheat flour. Be cautious if you have related allergies.
- → How should I store leftover crullers?
They are best enjoyed the day they are made, but can be stored in an airtight container for a short time to maintain freshness.