 Save to Pinterest
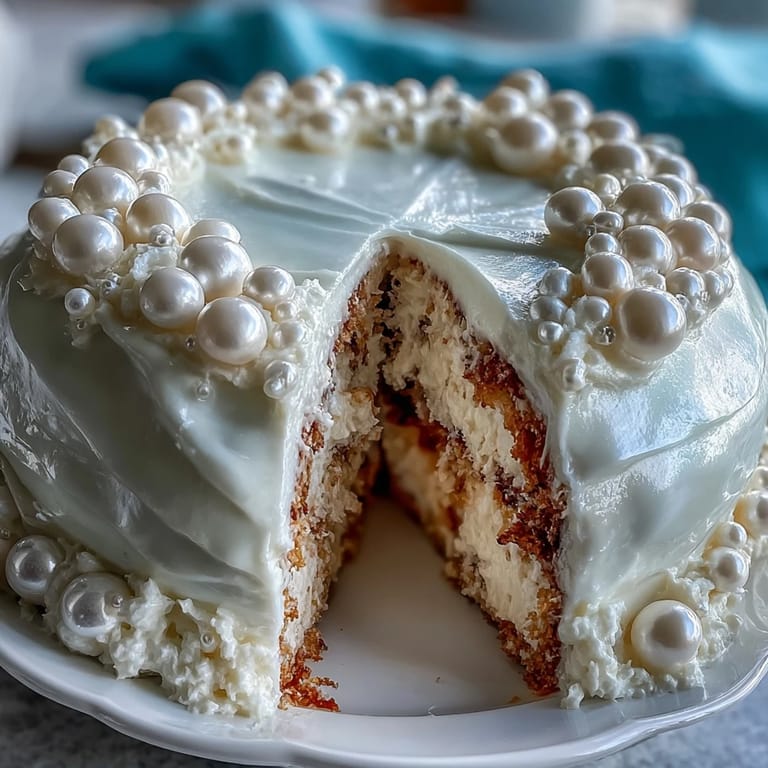
 My sister's daughter was turning eight, and I'd promised to bake her Communion cake—the kind that looked like it belonged in a fancy bakery but tasted like home. I remember standing in my kitchen on a quiet Saturday morning, flour dust catching the sunlight, thinking about how this particular cake needed to be both delicious and elegant, a cake that would make her feel special without making me feel stressed. That's when I landed on this sheet cake with pearl fondant, a combination that sounded fancier than it actually is once you understand the rhythm of it.
What I didn't expect was watching my niece's face when she saw it—not just the cake, but how carefully everyone handled it, like it was precious. Her grandmother took a photo that's still on the fridge, and honestly, it shifted something in how I think about making desserts. It's not just about the taste anymore, though that still matters; it's about creating something that feels like an occasion.
Ingredients
- All-purpose flour (3 cups): The foundation of a tender crumb—sifting it helps, but honestly, I often just whisk it well with the baking powder and salt to distribute the leavening evenly.
- Baking powder (2½ tsp): This gives you that gentle rise that keeps the cake moist rather than dense, and it's why the cake stays fresh longer than you'd expect.
- Salt (½ tsp): Never skip it; salt makes the vanilla sing and balances the sweetness in ways that seem small until you taste the difference.
- Granulated sugar (2 cups): The creaming method relies on this—beating it with butter creates tiny air pockets that make the crumb light and tender.
- Unsalted butter (1 cup for cake, 1 cup for buttercream): Room temperature is non-negotiable if you want that proper creaming; cold butter won't incorporate air the same way.
- Eggs (4 large, room temperature): Room temperature eggs emulsify better and help create that silky batter that bakes into an almost velvet-like texture.
- Pure vanilla extract (1 tbsp cake, 1 tsp buttercream): This recipe is a showcase for vanilla, so use the good stuff—the difference is real.
- Whole milk (1¼ cups): The moisture that keeps this cake tender even after days of sitting under fondant; whole milk matters more than you'd think for the final taste.
- Powdered sugar (4 cups, sifted): Sifting prevents lumps in the buttercream, and lumps will show through fondant no matter how much you smooth it.
- White ready-to-roll fondant (2 lbs): Buy quality fondant if you can—cheaper versions are grainier and don't smooth as beautifully, and this is where it shows.
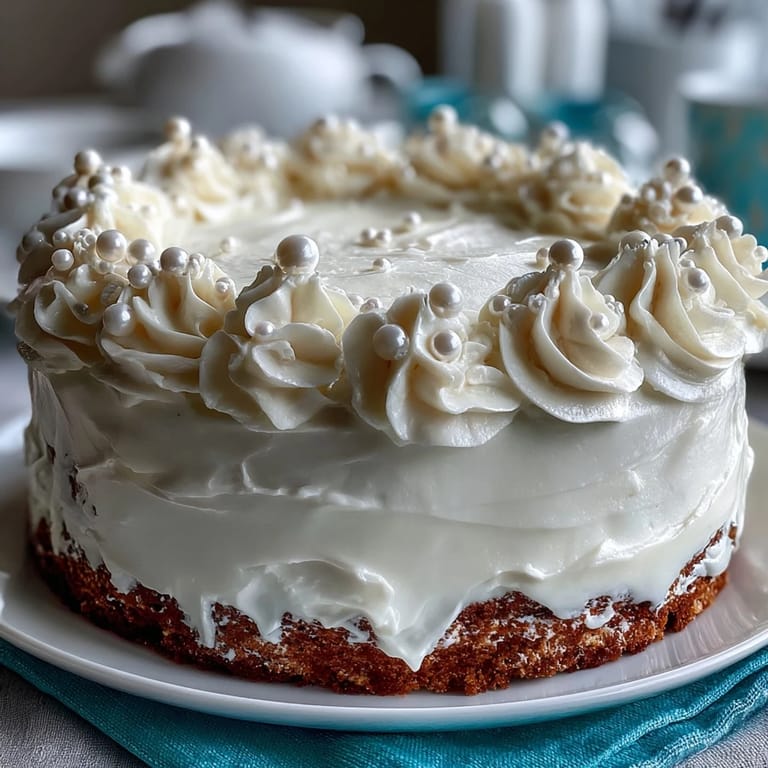
- Pearl luster dust: This is the magic ingredient that transforms plain white fondant into something that catches light and looks intentional; a little goes a long way.
- Edible pearls or sugar pearls: Optional but worth having on hand if you're celebrating something special—they're easier to arrange than you'd think.
- Light corn syrup (1 tbsp): A tiny brush of this diluted with water gives fondant that subtle shine that photographs beautifully without looking plasticky.
Tired of Takeout? 🥡
Get 10 meals you can make faster than delivery arrives. Seriously.
One email. No spam. Unsubscribe anytime.
Instructions
- Set up your workspace:
- Preheat the oven to 350°F and prepare your half-sheet pan with grease and parchment paper—this setup prevents sticking and gives you crisp edges. Having everything ready before you start mixing is the difference between a calm baking experience and a frantic one.
- Dry ingredients foundation:
- Whisk flour, baking powder, and salt together in a medium bowl and set it aside. This distributes the leavening evenly throughout the dry mixture, which matters more than you'd think for even rising.
- Cream the butter and sugar:
- In a large bowl or with a stand mixer, beat the softened butter and sugar for about three minutes until the mixture is noticeably lighter in color and fluffy—this is where air gets incorporated into the batter. You're not rushing this step; you're building the texture foundation.
- Incorporate eggs and vanilla:
- Add eggs one at a time, beating well after each addition so they fully integrate, then mix in the vanilla extract. Each egg needs a moment to fully combine before the next one goes in; this ensures a smooth, emulsified batter.
- Alternate wet and dry ingredients:
- Add the flour mixture and milk in three additions, starting and ending with flour—this prevents overmixing, which would make the cake tough. Mix on low speed just until you don't see any white streaks of flour; the batter should look silky but not overworked.
- Bake the cake:
- Pour the batter into your prepared pan, smooth the top gently, and bake for 30–35 minutes until a toothpick inserted in the center comes out clean. The cake will rise gently and the top will feel set when you lightly touch it.
- Cool properly:
- Let the cake cool in the pan for 10 minutes, then turn it out onto a wire rack to cool completely—rushing this step by trying to frost a warm cake is a mistake I've made more than once. Complete cooling is essential for the buttercream to adhere properly.
- Make the buttercream:
- Beat softened butter until creamy, then gradually add sifted powdered sugar, milk, vanilla, and salt, beating until fluffy and smooth. The gradual addition of sugar prevents lumps and ensures a silky, spreadable consistency.
- Apply the buttercream base:
- Once the cake is completely cool, spread a thin, even layer of buttercream over the entire surface and sides using an offset spatula. This layer is what the fondant will adhere to, so you want it smooth and even.
- Roll out and apply fondant:
- On a surface lightly dusted with powdered sugar, roll the fondant to about 1/8-inch thickness, then carefully drape it over the cake and smooth it gently with your hands or a fondant smoother. Work from the center outward to avoid trapping air bubbles, and take your time—the smoothing is where fondant work becomes meditative.
- Trim and finish:
- Trim the excess fondant from the bottom with a sharp knife, then brush lightly with water where you want to attach pearls or other decorations. Dust the surface with pearl luster dust using a dry food-safe brush for that shimmering effect, and optionally brush with a light corn syrup mixture for subtle shine.
- Arrange final decorations:
- Arrange edible pearls as desired to create your Communion motif—a cross, chalice, or simple border. This is the part that makes the cake feel like a celebration.
- Let it set:
- Allow the cake to sit for at least 30 minutes before serving so the fondant fully sets and the decorations have time to adhere properly.
 Save to Pinterest
 There's something about making a cake for an occasion that changes how you approach the recipe. This one became less about proving I could do it and more about creating a moment my niece would remember. The cake was gone in two days, but that photo is still there.
Why Baking This Cake Ahead Changes Everything
I learned the hard way that baking this cake the morning of a celebration is possible but exhausting. Instead, bake it the day before, wrap it tightly in plastic wrap, and store it at room temperature—the cake actually improves as it sits because the moisture redistributes. When you decorate the next day, you're calm and unhurried, which shows in the final result.
The Buttercream Layer Is Everything
I used to think buttercream under fondant was just something you had to do, but it's actually the difference between a beautiful cake and a perfect one. The buttercream acts as adhesive and also provides a smoother surface for the fondant to glide over—without it, you'll see every slight imperfection in the cake's surface telegraphed through the fondant. Make it smooth and even, and the fondant work becomes so much easier.
Small Details That Create Big Impact
The pearl luster dust, the optional corn syrup shine, and the arrangement of edible pearls might seem like extras, but they're what transform a sheet cake into something that feels ceremonial and special. Fondant is forgiving in ways that cake decorating often isn't—it covers mistakes and imperfections beautifully, which is probably why so many bakers love working with it once they get past the initial learning curve.
- Pearl luster dust is applied to dry fondant with a dry brush for the most natural-looking shimmer.
- Don't dilute the corn syrup heavily when brushing—a tiny amount of shine is more elegant than a glossy coating.
- Edible pearls stick best to fondant that's been lightly dampened with water, but water is also something to use sparingly or the fondant softens.
 Save to Pinterest
 This cake is the one you make when you want to feel like a pastry chef without needing to actually be one. It's elegant enough for a celebration and forgiving enough that you'll want to make it again.
Recipe FAQs
- → How do I prevent the fondant from cracking?
Ensure the cake and buttercream layer are smooth and completely cooled before applying fondant. Knead fondant well to soften and roll evenly to avoid cracks.
- → Can I substitute almond extract for vanilla?
Yes, replacing half the vanilla extract with almond extract adds a gentle nutty flavor that complements the cake's moist texture.
- → What is the best way to store the cake before serving?
Keep the cake covered at room temperature for up to one day. For longer storage, refrigerate tightly wrapped to preserve freshness and fondant texture.
- → How do I achieve a smooth buttercream layer?
Beat butter until creamy, then gradually add sifted powdered sugar, milk, and vanilla. Spread evenly with a spatula for a smooth surface.
- → What decorations can enhance the fondant finish?
Use pearl luster dust for shimmer, add edible pearls or sugar pearls, and lightly brush with corn syrup for a glossy shine to elevate visual appeal.